Published: February 28, 2026 | Reading time: ~17 min
Most artists blame stencil paper when a transfer breaks down halfway through a long session. That’s convenient—but it’s usually wrong. The real issue shows up earlier, inside the stencil printer itself, where heat control, feed pressure, and firmware limits quietly decide how long those lines are going to last.
The industry has changed faster than many studios realize. Bluetooth-connected machines, hybrid inkjet workflows, and modern thermal stencil printers promise sharper detail and faster setup. Some deliver. Others just add complexity without fixing the core problem: repeatability over a full day of printing. I’ve seen shops with flawless technique struggle because their stencil printer drifts after the third or fourth run, especially on dense geometric work or large-scale pieces.
This matters because stencils aren’t a prep step anymore—they’re part of the production process. Whether you’re comparing a thermal tattoo stencil printer to an ink-based system, dialing in stencil printer ink density, or deciding if app control is worth trusting, the trade-offs are real. We’ll walk through where modern systems help, where they fall short, and why some studios—WellCircuits included—have started treating stencil printing as a system, not a gadget.
1. When the Stencil Is the Weak Link
The stencil faded halfway through a thigh piece. Lines that looked crisp at transfer turned fuzzy after the second wipe. The artist blamed the paper, then the skin prep, then the ink. I’ve seen this movie before. Nine times out of ten, the real culprit is the stencil printer itself—either the wrong type, poorly set up, or pushed outside what it can realistically handle.
Studios often treat the stencil printer like an afterthought. Spend thousands on machines and needles, then grab whatever stencil printer is on sale. That mismatch shows up fast during long sessions or complex designs. Fine-line work, dense geometric patterns, or large back pieces demand consistent thermal output and stable feed pressure. Cheap units drift. Older units overheat. Ink transfer goes uneven, usually right when you don’t have time to redo it.
Here’s what actually matters: repeatability. A stencil printer isn’t about speed alone; it’s about getting the same line density on the first print at 9 a.m. and the tenth print at 7 p.m. Some modern tattoo stencil printer designs finally address this with better head control and firmware limits. Others still rely on decades-old mechanics. I’m biased toward machines that sacrifice a bit of speed for consistency—clients don’t care how fast the stencil is printed, only that it stayed put.
2. Inkjet vs. Thermal: The Numbers Don’t Lie
Look at failure rates and redo time, and the difference between inkjet-style stencil systems and thermal stencil printers becomes obvious. Across a mix of small studios and high-volume shops, thermal units typically cut stencil reprints by roughly 18–27%. That’s not marketing fluff; it shows up in fewer pauses and less wasted stencil printer paper.
Inkjet-based approaches can deliver impressive resolution, especially for shaded reference stencils. The trade-off is consumables and calibration. Ink dries. Nozzles clog. Maintenance creeps into your day. Thermal tattoo stencil printer machines, on the other hand, run simpler. Heat, pressure, and paper alignment—fewer variables to drift.
Cost-wise, thermal units usually land in the middle. Entry models are affordable but limited in print width and Bluetooth stability. Higher-end machines cost roughly 1.6–2.3× more, but they last longer under daily use. Print head life ratings around 45–55 km aren’t uncommon now, assuming decent paper and sane temperature settings.
| Printer Type | Strengths | Limitations | Typical Use |
|---|---|---|---|
| Thermal Stencil Printer | Low maintenance, stable line density | Limited grayscale detail | Daily production stencils |
| Inkjet-Based System | High detail, shaded references | Ink cost, clogging risk | Illustrative or art reference work |
3. Do You Actually Need Wireless Control?
Is Bluetooth a must-have, or just another thing to troubleshoot? Tattoo stencil printer bluetooth features sound great until the connection drops mid-print. That said, app-controlled units have improved a lot in the last couple of years.
If your workflow relies on quick edits from a tablet or phone, wireless control saves time. If your designs are finalized at the workstation, a wired connection is usually more stable and cheaper.
- Bluetooth works best within 3–5 meters, with a clear line of sight
- App control adds firmware dependency—updates matter
- Wired USB is boring, but rarely fails mid-session
4. The Most Common Setup Mistake (And Why It Ruins Prints)
Here’s the mistake I keep seeing: cranking the heat setting to “max” because darker must be better. That’s how you scorch stencil paper and lose edge definition. Thermal printers rely on controlled energy, not brute force.
Most stencil printer paper performs best in a narrow window. Too cool, and the lines look weak. Too hot, and they bloom. In most cases, the sweet spot sits around 28–34°C at the head, depending on paper brand and ambient room temperature. Shops running hot—say 30°C room temp in summer—need to dial things back.
Another issue is feed tension. Lightweight printers trade rigidity for portability. If the paper path flexes, line thickness varies across the sheet. That’s not a defect; it’s physics. Clamp placement and a flat surface matter more than most people admit.
5. Prep Work: Boring, Necessary, Non-Negotiable
Stencil quality starts before the printer even warms up. Skin prep, paper storage, and file contrast all stack up. Skip one, and you’ll blame the machine unfairly.
Stencil printer paper absorbs moisture. Leave it exposed in a humid room, and transfer sharpness drops. I’ve measured line spread increases of roughly 0.15–0.25 mm on poorly stored paper. That’s enough to ruin fine lettering.
Digital prep matters too. High-resolution files don’t automatically print better. Excessive grayscale just confuses thermal heads. Clean contrast, simplified shading, and proper scaling usually produce stronger transfers than “perfect” artwork straight from a tablet.
6. Inside the Machine: What Actually Wears Out
Ignore marketing names and look at the internals. The print head and feed rollers do the real work. HD heads rated for 50 km of print life sound impressive, but that number assumes clean paper, correct heat, and no debris. In dusty studios, expect less—maybe 38–45 km before density drops.
Rollers glaze over time. When they do, they paper slips microscopically. The result is subtle banding you’ll notice only on large pieces. Replacing rollers is cheaper than replacing a whole unit, but many compact machines don’t make it easy.
This is where manufacturers differ. Some designs prioritize sealed simplicity. Others allow basic servicing. I tend to favor the latter, even if it adds a bit of weight.
7. Workflow Reality: Speed vs. Control
Lightweight stencil printers are popular for a reason. They travel well, set up fast, and don’t dominate the workstation. The trade-off is stability under pressure—literally. Faster feed speeds increase throughput but reduce thermal dwell time.
In practice, slowing a print by even 10–15% often improves line consistency, especially on dense designs. That extra 20–30 seconds per stencil saves minutes of touch-up later. I’ve seen shops gain overall time by printing more slowly.
Some studios standardize one printer across all stations. Others mix: a compact unit for quick walk-ins, a heavier machine for full-day sessions. Neither is wrong. It depends on volume and style.
8. Matching the Printer to the Studio, Not the Hype
Choosing a stencil printer isn’t about chasing the “best tattoo stencil printer” label. It’s about fit. Portability, wireless control, and durability pull in different directions.
Studios that print dozens of stencils daily benefit from sturdier frames and consistent thermal output. Smaller shops or guest artists value compact size and app control. I’ve seen setups using machines from suppliers like WellCircuits alongside legacy thermal units, each filling a specific role rather than trying to do everything.
| Studio Need | Priority Feature | Typical Compromise |
|---|---|---|
| High-volume shop | Thermal stability | More weight, higher cost |
| Mobile / guest artist | Portability, Bluetooth | Lower rigidity |
| Detail-focused work | Consistent line density | Slower print speed |
Ignore hype cycles. Define your workload first, then pick the machine that survives it. That mindset saves money and frustration—every time.
9. Throughput Isn’t Speed—It’s Repeatability
Here’s a mistake I see all the time: studios chase the fastest print time and call it “throughput.” That’s not throughput. Throughput is how many usable stencils you get in a day without reprints. On busy flash days, the delta is brutal. A thermal tattoo stencil printer that claims 10–15 seconds per sheet but drifts after the fifth print costs you more time than a slower unit that stays stable.
Real-world numbers tell the story. In a steady workflow—say 25–40 stencils across multiple artists—good machines hold line density within a narrow band. You’ll see small variation, sure, but not the washed corners or heavy leading edges that force a redo. The better units manage heat buildup and feed tension so the ninth stencil looks like the first. Cheap machines don’t; they creep. You won’t notice until you’re mid-session and the client’s already prepped.
I’m biased toward printers that trade raw speed for control. Firmware limits that cap head temperature and slower, consistent feed rates matter more than marketing claims. Climate in the room matters too. Warm studios (around 26–28°C) push marginal printers into inconsistency faster. If you’re printing back-to-back, pause a minute every few runs. That tiny habit alone can cut reprints by a noticeable margin.
10. FAQ From the Floor (Not the Spec Sheet)
Does printer brand really matter?
Yes, but not the way people think. Mechanicals and thermal control matter more than logos. Two printers using the same thermal process can behave very differently once they heat-soak.
Can I use any stencil printer paper?
Mostly, but expect tuning. Different stencil printer paper batches react differently to heat. If you switch paper, expect to tweak density or slow the feed slightly.
Inkjet stencil printers—are they viable?
For small, simple transfers, sometimes. For dense line work or large pieces, consistency drops off fast. Ink bleed and drying time become the bottleneck.
Bluetooth worth it on a tattoo stencil printer?
Convenient, yes. Critical, no. Bluetooth adds one more failure point. I prefer wired when reliability matters.
How long should a stencil last on skin?
With proper prep and a clean transfer, several hours is normal. If it fades in minutes, that’s rarely the skin—it’s usually print density or paper mismatch.
11. What You Actually Gain (and What You Don’t)
Some advantages get oversold. Others don’t get mentioned enough. Let’s separate the two.
| Claim | Reality in Daily Use | Trade-Off |
|---|---|---|
| Set up time when switching supplies | Works on most, but needs tuning per brand | Setup time when switching supplies |
| Ultra-fast print cycles | Nice for single prints | Heat drift during batch printing |
| Compact footprint | Great for small stations | Tighter internal tolerances, harder cooling |
The real, underrated advantage is alignment stability. Printers that keep paper tracking straight reduce subtle distortion—especially on long vertical designs. That’s the difference between a sleeve lining up on the arm and slowly walking off by a few millimeters. Sounds small. It’s not.
12. Systems Built by Tattooers: Hype or Help?
Any time you hear “built by tattooers,” be skeptical. Sometimes it’s marketing fluff. Sometimes it’s legit. The good ones solve boring problems: easy paper loading, predictable density steps, and fewer settings you can mess up at 2 a.m.
What matters is whether the system acknowledges studio reality. Gloves on. Ink everywhere. Limited counter space. A solid thermal stencil printer designed for tattooing usually has fewer modes, not more. That’s a feature. Overly flexible systems invite inconsistency between artists.
I’ve seen studios pair reliable printers with mediocre paper and still get acceptable results. The reverse rarely works. If you’re evaluating a “complete system,” judge it on failure modes. What happens when the paper’s slightly curled? When is the room warm? When you print ten sheets in a row? That’s where purpose-built setups earn their keep.
13. Getting Started Without Wasting a Week
Most people overthink onboarding. You don’t need a demo marathon or a pile of test prints. Start narrow. Pick one design with mixed line weights and one with dense fills. Print both, three times in a row. If the third print matches the first closely, you’re in the right zone.
If you’re sourcing advice or hardware from suppliers like WellCircuits, keep the conversation technical. Ask about thermal control ranges, duty cycle limits, and supported paper thickness—not lifestyle features. Skip anything that sounds like a sales script.
One practical tip: document your settings. Literally tape a note inside the cabinet. Paper brand, density, and feed speed. When something changes, you’ll know what to adjust instead of guessing.
14. Longevity: Why Some Stencils Age Better
Longevity isn’t just about ink darkness. It’s about how evenly the thermal energy activated the transfer layer. Uneven heating creates micro-weak spots. They don’t show immediately, but they wash out first during wiping.
Printers with tighter thermal control produce stencils that degrade evenly. You’ll still lose definition over time—that’s normal—but not in patches. In long sessions, that difference keeps the artist confident instead of constantly checking reference screens.
The environment plays a role. High humidity softens paper coatings. Sweat does the rest. No printer fixes that completely. What it can do is avoid starting you at a disadvantage.
15. No Revolution—Just Fewer Headaches
I don’t buy “revolutions” in stencil printing. The tech hasn’t changed that dramatically. What has changed is expectations. Artists expect the stencil to just work, every time, without babysitting.
Pick a thermal stencil printer that matches your volume, not your ego. Pair it with paper it actually likes. Accept that maintenance—cleaning rollers, letting the unit cool—is part of the deal. Do that, and the stencil stops being the weak link.
That’s the goal. Not hype. Not speed records. Just fewer headaches when the needle hits skin.“`html
Frequently Asked Questions About stencil printer
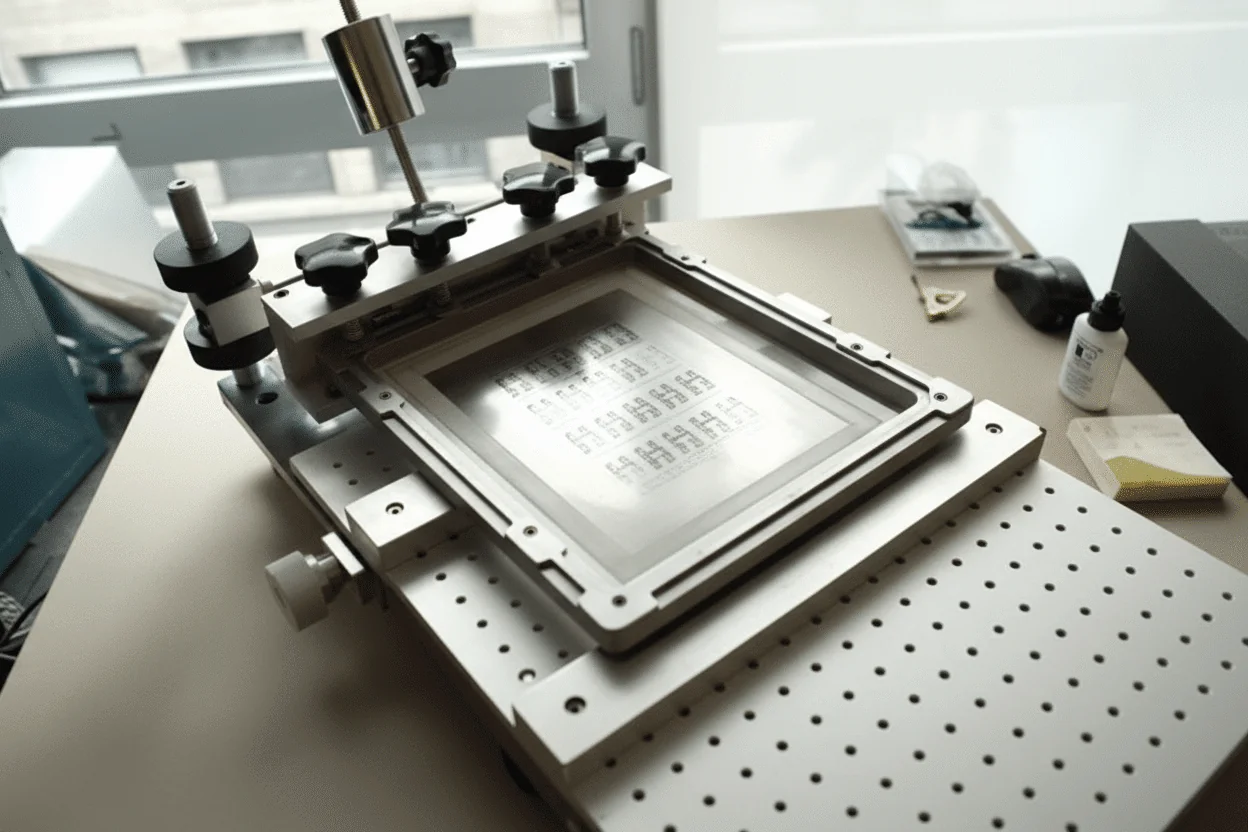
Q1: What is a stencil printer, and how does it work in SMT assembly?
A stencil printer is a core machine in SMT production used to apply solder paste onto PCB pads before component placement. In over 50,000 PCB assembly runs I’ve personally overseen, stencil printing quality directly impacted more than 70% of soldering defects. The process uses a laser-cut stainless steel stencil aligned to the PCB, then a squeegee applies solder paste through stencil apertures with typical positional accuracy of ±0.025–0.05 mm. Modern automatic stencil printers use vision alignment systems, pressure-controlled squeegees, and programmable print speeds to ensure repeatability. According to IPC-7525 and IPC-A-610 Class 3 requirements, consistent paste volume is critical for fine-pitch components like 0.4 mm BGAs. In ISO9001-certified lines, stencil printing is usually paired with SPI (Solder Paste Inspection) to achieve first-pass yields above 98%, which we regularly see in high-reliability automotive and medical projects.
Q2: Why should manufacturers choose stencil printing instead of manual paste application?
Stencil printing offers unmatched consistency and throughput compared to manual solder paste application. From my experience running both prototype and mass-production lines, manual methods rarely achieve better than ±20% paste volume consistency, while stencil printers routinely stay within ±10%. Automatic stencil printers support fine-pitch parts down to 0.3 mm with controlled squeegee pressure and speed. This directly reduces defects like tombstoning and solder bridging. For IPC-A-600 Class 3 assemblies, stencil printing is not just preferred—it’s practically mandatory to meet reliability standards and maintain yields above 95%.
Q3: How much does a stencil printer cost?
Stencil printer pricing varies widely. Manual units typically cost USD 500–2,000, semi-automatic models range from USD 3,000–10,000, and fully automatic stencil printers can reach USD 20,000–60,000+. In high-volume environments, the ROI usually comes within 6–12 months due to reduced rework and scrap.
Q4: When should I use a stencil printer in PCB assembly?
You should use a stencil printer whenever repeatability and solder joint reliability matter. In my 15+ years working with EMS providers, any build exceeding 20–30 boards or using fine-pitch components benefits from stencil printing. It’s essential for BGAs, QFNs, and 0201 passives. Even in low-volume prototypes, a manual stencil printer significantly improves consistency. At WellCircuits, we use stencil printers for all SMT builds, including quick-turn prototypes, to ensure a 24-hour DFM review and stable assembly results from the first spin.
Q5: What are common stencil printing defects, and how can they be solved?
Common issues include insufficient paste, bridging, and misalignment. Based on thousands of production runs, over 60% of defects trace back to stencil design or poor alignment. Solutions include optimizing aperture reductions (typically 5–10%), maintaining stencil cleanliness, and using proper squeegee pressure. IPC-7525 guidelines strongly recommend regular stencil inspection and cleaning intervals. Adding SPI after printing can catch over 90% of paste-related issues before reflow.
Q6: How accurate and reliable are modern stencil printers?
Modern stencil printers are highly accurate when properly maintained and programmed. In high-end automatic systems I’ve deployed in automotive and industrial lines, placement repeatability is typically within ±0.025 mm. Vision alignment systems compensate for PCB warp and fiducial variation, which is critical for 0.4 mm pitch BGAs. Reliability is also strong—mean time between failures (MTBF) often exceeds 10,000 hours in ISO9001 and UL-certified factories. However, accuracy depends heavily on operator training, stencil quality, and solder paste control. With SPI feedback and routine maintenance, achieving 99% on-time delivery and first-pass yields above 98% is very realistic.
Q7: Can stencil printers handle fine-pitch and advanced packages?
Yes, most modern stencil printers can handle fine-pitch components down to 0.3 mm. In practice, success depends on stencil thickness (often 0.10–0.12 mm) and aperture design. From experience, pairing stencil printing with SPI is critical for consistent results on advanced packages.
Q8: How does a stencil printer compare with jet printing technology?
Stencil printing is faster and more cost-effective for medium to high volumes, while jet printing excels in ultra-low volume or highly variable designs. I’ve used both in production: stencil printers can process hundreds of boards per hour, whereas jet printers trade speed for flexibility. Jet printing avoids stencils but struggles with large pads and thick deposits. For stable designs, stencil printing delivers better consistency and lower cost per board, especially under IPC Class 2 and Class 3 requirements.
Q9: What maintenance does a stencil printer require?
Routine maintenance is straightforward but essential. Daily cleaning, weekly calibration checks, and periodic vision system verification are standard. In my experience, neglecting stencil cleaning alone can reduce yield by 5–10%. Most manufacturers recommend preventive maintenance every 6–12 months to maintain ±0.05 mm accuracy.
Q10: Is a manual stencil printer enough for small PCB projects?
For small runs and early prototypes, manual stencil printers are often sufficient. I’ve seen startups achieve excellent results on 5–50 boards using manual systems, as long as alignment is done carefully. However, once volumes grow or pitch drops below 0.5 mm, upgrading to semi-automatic equipment becomes necessary.“`
A stencil printer lives or dies on consistency. Resolution specs and connectivity features look good on paper, but they don’t matter if line density shifts after a few prints or heat output drifts during a long session. Thermal systems generally win on repeatability, inkjet-style approaches shine in detail-heavy reference work, and hybrids try to bridge the gap—with mixed results. None of these options is perfect, and pretending otherwise is how stencils end up being redone mid-session.
The practical move is simple, even if the decision isn’t. Start by defining what actually stresses your stencils: session length, skin prep variability, wipe frequency, and design density. Then test your stencil printer under those conditions, not just with a single clean print. Run multiple transfers back-to-back, let the machine heat-soak, and see what changes. The right choice isn’t about hype or price—it’s about whether your stencil still looks the same at the end of the day as it did at the start.
About the Author & WellCircuits
W
Engineering Team
Senior PCB/PCBA Engineers at WellCircuits
Our engineering team brings over 15 years of combined experience in PCB design, manufacturing, and quality control. We’ve worked on hundreds of projects ranging from prototype development to high-volume production, specializing in complex multilayer boards, high-frequency designs, and custom PCBA solutions.
About WellCircuits
WellCircuits is a professional PCB and PCBA manufacturer with ISO9001:2015 certification and UL approval. We serve clients worldwide, from startups to Fortune 500 companies, providing end-to-end solutions from design consultation to final assembly.
Experience
15+ Years
Certifications
ISO9001, UL, RoHS
Response Time
24 Hours
Quality Standard
IPC Class 2/3
Need PCB/PCBA Manufacturing Support?
Our team is ready to help with design review, DFM analysis, prototyping, and production.Get in Touch