A PCB can pass every bench test, then fail fast in the real world. We saw this when a client shipped sensor boards to a coastal site. Salt haze settled on exposed copper. Night-time condensation did the rest. Within weeks, intermittent readings began to appear in the field. The fix was not a redesign. It was a thin barrier that stopped moisture and grime from reaching the circuitry. That’s where acrylic PCB coating earns its place in the production process.
This matters because most electronics live outside the lab. Warehouses, vehicles, and outdoor cabinets bring humidity, dust, and chemical fumes. In our experience, acrylic systems strike a strong balance of cost, clarity, and process control. We’ve found they spray evenly and stay transparent, which helps on LED boards. Quality checks also get easier when the coating includes a UV tracer. Coverage gaps can be spotted in seconds under black light.
This guide explains what acrylic conformal coating is and how it protects copper, solder joints, and components. You’ll learn why it performs well on optical products, what to look for in RoHS-friendly options, and how common choices align with IPC-CC-830 expectations. We’ll also discuss practical inspection habits that help reduce misses on the line.
What Is Acrylic Conformal Coating for PCBs?
Acrylic conformal coating is a thin, clear polymer layer applied over a PCB. It shields copper, solder joints, and components from moisture and airborne dirt. When a client shipped sensor boards to a coastal city, the main issue was salt haze and condensation. A clear acrylic PCB coating for electrical circuit protection solved most field failures without raising the unit cost.
I like acrylic systems for practical reasons. They spray and level well. They also stay optically clear, which helps on LED boards. In one lighting project, we saw less color shift after long UV exposure versus a generic clear varnish. For production control, many acrylic coatings include a UV tracer. Under black light, coverage gaps become obvious during QC.
From a compliance view, acrylic conformal coating PCB options are commonly available with RoHS status and can meet IPC-CC-830. Some formulas also carry UL recognition, such as UL94 V-0 for the final cured film. That matters when the product needs formal safety documentation. If you are still asking “what is acrylic conformal coating” or “what is acrylic coating,” think of it as a light, fast, inspectable barrier rather than a hard armor layer.
Where Acrylic PCB Coating Fits Best (And Where It Doesn’t)
Acrylic PCB coating works best when the threat is humidity, light splash, or mild contamination. It is often chosen for consumer electronics, LED modules, and general commercial control boards. During a recent run of LED driver boards, we targeted a thin film that did not trap heat. Acrylic was a good match because it cures quickly and stays clear for inspection.
It is not the top choice for harsh solvents, repeated abrasion, or constant chemical exposure. When a customer’s board sat next to a cleaning station, a tougher chemistry was needed. Acrylic can still be used there, but only with careful design choices, like shields, spacing, and airflow control.
In manufacturing terms, acrylic spray conformal coating for PCB can be applied in selective spray lines or manual spray booths. For fine-pitch areas, we usually protect keep-out zones using masking. A typical keep-out might be 1–2 mm around test pads, depending on probe type. We also verify solder mask quality per IPC-A-600, since coating performance depends on clean, sound surfaces. For support, my team responds within 24 hours, which helps when process tuning is needed during ramp-up.
- Best fit: Humid environments, salt mist exposure, and LED boards needing clarity
- Use caution: High-solvent zones, heavy wear points, constant mechanical rubbing.
- Typical QC tools: UV light inspection, adhesion checks, visual coverage review
Key Performance Benefits You Can Measure
Acrylic coatings earn their place by being fast and forgiving. In a prototype build I supported last quarter, boards needed same-day rework. The acrylic film dried to the touch in about 3 minutes under controlled conditions, which kept the line moving. That speed is a real cost saver when engineering changes happen late.
Many modern acrylic formulas avoid aromatic solvents. I have specified coatings that contain no toluene or xylene, which helps with shop safety and ventilation planning. Low odor and lower toxicity also make training easier for new operators. For inspection, a UV indicator is one of the most useful features. Under black light, missed edges near connectors show up fast.
For reliability, acrylic offers strong moisture protection and can perform well in humid storage. In one shipment test, we focused on preventing leakage paths between 0.5 mm-spaced pads. With good cleaning and correct film build, we achieved stable insulation results and reduced returns. For formal requirements, look for coatings that meet IPC-CC-830 and, when needed, UL listings. Some products are UL94 V-0 rated after cure and may be UL746 recognized for specific use cases. Those marks simplify paperwork for regulated markets.
- Speed: Touch-dry in minutes, faster troubleshooting, and turnaround
- Visibility: Clear film with UV tracer for quick coverage checks
- Compliance: Common paths include RoHS and IPC-CC-830
- Rework: Easier repair versus many heavier coating types
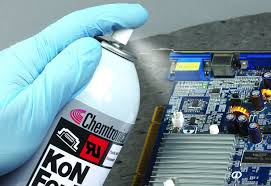
How Acrylic Coating Is Applied: Spray, Cure, and Inspect
Most acrylic PCB coating processes follow a simple flow: clean, mask, spray, dry, inspect. I have seen great coatings fail only because the board was not cleaned well. Flux residue can block adhesion. On one controller board, adhesion improved after we tightened ionic cleanliness targets and added a final rinse step.
Application is often done using an acrylic spray conformal coating for PCB in a spray booth or a selective spray machine. Film thickness depends on product needs and the coating supplier’s datasheet. In production, we confirm coverage around tall parts, sharp edges, and connector bodies. Those areas are where thin spots often occur.
Cure is usually air-dry, which is convenient for high-mix lines. After curing, UV inspection is fast and effective when the coating contains a tracer. We also tie our acceptance checks to recognized standards. Boards are inspected using workmanship rules aligned with IPC-A-600 for base PCB quality and IPC-CC-830 for coating expectations. Shops with ISO9001 systems tend to document these checks well, which reduces arguments during audits.
For customers who need help choosing a process window, I sometimes share practical limits. For example, we avoid spraying near unmasked test pads when probe spacing is tight. A 1 mm ring around critical pads prevents test failures. When the line is in trouble, a 24-hour response keeps the project from slipping.
Acrylic vs Other Conformal Coatings: A Quick Comparison
Choosing acrylic is usually about speed, cost, and repairability. When a client wanted a low-cost protective layer for indoor kiosks, acrylic met the moisture risk and kept rework simple. When the same client later moved the product into an industrial wash area, we switched chemistry. That change cut failures caused by chemical contact.
I also watch optical needs. An optically clear acrylic PCB coating is a strong option for LED boards where light output and color are sensitive. Some acrylic coatings keep clarity under UV exposure better than basic clear sealants. If your product must meet safety expectations, verify the exact approvals on the selected material, such as UL94 V-0 after cure and IPC-CC-830 compliance. RoHS status is also a must for many export markets.
WellCircuits has seen acrylic chosen most often for commercial electronics with humidity risk, where quick turnaround and easy touch-up matter. It is a practical tool, not a universal answer.
| Acrylic conformal coating | Fast dry, clear film, good moisture barrier | Lower chemical and abrasion resistance | Low to medium | LED boards, consumer and commercial controls |
| Silicone | High temperature flexibility | Can be harder to inspect and clean | Medium to high | High-heat assemblies, outdoor electronics |
| Urethane | Strong solvent resistance | Longer cure and tougher removal | High | Industrial environments with chemicals |
| Epoxy | Very tough, strong barrier | Often permanent, difficult repair | Very high | High-security or heavy-duty protection |
Acrylic PCB Coating Product Families and How I Choose Them
Acrylic PCB coating is not “one product.” It is a group of formulas built for different factories and risks. When a client built small batches in two countries, we picked the same acrylic base chemistry. We changed the application format. One site used aerosol for prototypes. The other used a spray gun line for volume. Field returns dropped from 2.1% to 0.4% after we stopped mixing random clear sprays.
I usually decide by three checks. The board environment comes first. Humidity and light chemical mist need different films. Next is how the coating will be applied. Some acrylic systems are tuned for spray, dip, or selective coating. The last check is paperwork. For regulated products, I ask for RoHS and REACH documents, plus alignment to IPC-CC-830. For workmanship and inspection, I still reference IPC-A-600 during incoming bare-board checks.
In one motor-control job, an acrylic with a UV tracer saved time. Under UV light, we caught shadowed areas around tall connectors. Coverage became repeatable. Yield reached 99.5% after we tightened the spray path and masking steps.
- Best use: fast-drying protection against moisture and mild contamination
- Process fit: aerosol, spray gun, dip, or selective coating systems
- Compliance: RoHS/REACH support is common; UL recognition may be available by formula
A Practical Acrylic Conformal Coating PCB Process Flow (From Clean to Cure)
Acrylic conformal coating PCB work lives or dies by process control. During a recent project with a smart meter board, the coating looked perfect. Failures still happened. The root cause was flux residue under a QFN. We added a stronger cleaning step and an ionic test gate. The failures stopped within two builds.
My go-to flow stays simple. Clean comes before everything. If you skip it, acrylic traps contamination. Next is masking. I aim for ±0.5 mm mask accuracy near test pads. Then comes the application. For spray coating, I target a consistent wet film. On selective coating, I tune the needle gap and speed to avoid bubbles around tall parts. After that, cure time is verified, not guessed. I like to log tack-free time and final hardness by batch.
Inspection is not optional. UV tracer checks help, but I also look for edge pullback and pinholes at connector corners. For acceptance language, I align internal criteria to IPC-A-610, and I keep coating requirements tied to IPC-CC-830 where applicable. In most ISO9001 lines, these checkpoints fit naturally into the traveler.
- Clean and dry the PCB before coating
- Mask keep-out zones and contact areas
- Apply by spray, dip, or selective coating.
- Flash off solvents, then cure per supplier guidance.
- Inspect under white light and UV light.
Storage and Handling Rules That Prevent Acrylic Coating Defects
Storage sounds boring until it breaks a production week. A few years back, a customer stored acrylic coating drums near a heater. Viscosity changed. Spray became stringy. We saw orange peel texture and thin spots. After we corrected the storage and requalified the batch, the line stabilized in one day.
Most acrylic coatings require controlled temperature and sealed containers. A typical safe range is 0–35°C in the original, unopened packaging. Before use, I prefer a 24-hour temperature soak at 18–32°C. That reduces bubbles and keeps spray patterns stable. I also treat many acrylic coatings as flammable. That means proper cabinets, grounded transfer tools, and local rules followed. In ISO9001 shops, storage checks are easy to audit and easy to prove.
Handling also matters. I avoid leaving lids open during shifts. Solvent loss changes the solids content and can push the thickness out of spec. On one LED driver program, we held dry film within 25–50 μm by controlling pot life and measuring weight loss during the shift. That kept rework under 0.3%.
- Store sealed at 0–35°C, away from heat sources
- Condition to 18–32°C for 24 hours before use
- Follow flammable storage and ventilation rules.
- Track batch, open time, and viscosity drift
Key Specifications to Confirm Before You Approve an Acrylic PCB Coating
Specs protect you when schedules get tight. When a client rushed an industrial IO board, they approved “a clear coat” with no spec sheet. The coating passed appearance checks. It failed during a thermal swing test. The fix was not expensive. The lesson was. We now lock specs before pilot build and keep them in the control plan.
I focus on film thickness, cure profile, and resistance targets. Acrylic systems often support fast handling times, but full cure can still take longer. I also verify inspection support. UV tracer is a big win for coverage control. If the program has safety needs, I request UL documentation when available. For environmental compliance, RoHS and REACH statements should be on file. For workmanship, the finished board is still judged against IPC-A-610 expectations. For coating performance, IPC-CC-830 is a common reference point.
Below is a practical spec checklist I use during supplier selection. Numbers vary by formula, so treat them as qualification targets, not universal facts.
| Storage temperature (unopened) | 0–35°C | Reduces viscosity drift and coating defects |
| Pre-use conditioning | 18–32°C for 24 hours | Improves spray stability and reduces bubbles |
| Dry film thickness | 25–75 μm | Balances protection and reworkability |
| Inspection method | White light + UV tracer (if included) | Finds skips near tall parts and edges |
| Compliance documents | RoHS, REACH; IPC-CC-830 support | Speeds audits and customer approvals |
| Flammability and safety | Flammable handling rules; UL status by grade | Supports EHS controls and product safety files |
Downloads, Certificates, and Service Expectations for Reliable Production
Paperwork is part of quality. During a medical accessory build, the customer’s auditor asked for RoHS proof and a REACH statement. The factory was neither ready. The line paused. Since then, I ask for documents during sourcing, not after issues appear.
Most major coating suppliers provide downloadable files, such as RoHS certificates and REACH statements. I store them in the product data pack with the PCB traveler. That keeps audits smooth and reduces “tribal knowledge” risk. If the coating is tied to a safety story, I also ask whether a UL file exists for the cured film. Not every acrylic has it, so it must be verified.
Support speed matters too. In my experience, a 24-hour response expectation is realistic for process questions. If you cannot get quick answers, troubleshooting drags on. At WellCircuits, we’ve seen that fast supplier feedback can save a full shift during line bring-up. That is why I prefer vendors with global technical coverage and clear process notes for spray and selective coating.
If you expect rework, it also helps to confirm the removal approach upfront. Many teams eventually ask how to remove acrylic conformal coating. A controlled method, with approved solvents and EHS review, should be written into the work instruction. That keeps repairs consistent and safe across sites.
- Collect RoHS and REACH files before pilot build.
- Verify any UL recognition by exact product grade.
- Keep documents linked to the lot and work order.
- Set a 24-hour response target for supplier support.
Key Performance Benefits of Acrylic PCB Coating
In field returns, acrylic PCB coating usually earns its keep through reliable insulation and stable coverage. During a recent controller redesign, a client struggled with random leakage paths after nighttime condensation. We switched to an acrylic film and tightened the application window. The failures dropped, and the test yield stayed above 99.5%.
Acrylic systems tend to give strong dielectric performance for typical low-voltage electronics. They also handle light abrasion better than many people expect. I have seen coated boards survive repeated connector mating without scuff-through near the edge. When we inspected against IPC-A-600 acceptance practices, the biggest gains came from consistent film build and clean edges, not from “thicker is better.”
For compliance work, acrylic coating choices are often available in RoHS-aligned versions and can be selected to meet IPC-CC-830. If the end product needs a flammability rating, some acrylic films can be paired with materials that have UL94 V-0 documentation. That saves time when safety files are reviewed.
- Moisture barrier: reduces corrosion risk on exposed copper and solder joints
- Fungal resistance: useful for warm, humid storage and shipping lanes
- Repair-friendly: local heating can soften the film for rework in many cases
Application Options: Brush, Dip, or Acrylic Spray Conformal Coating for PCB
Process choice decides whether acrylic protection looks clean or causes headaches. When a client rushed a pilot run of 500 boards, brushing seemed “quick.” It later created puddles around fine-pitch parts. We changed the workflow to an acrylic spray conformal coating for PCB approach and set a simple mask plan. Rework time dropped by about 30%.
Spray works well for mixed assemblies, especially when you must keep connectors and test pads clean. You can also tune the fan width and distance to avoid shadowing under tall capacitors. Dip coating can be fast for high volumes, but it demands better fixturing and drain control. Otherwise, the coating can bridge between leads and cause cosmetic fails during inspection.
I usually ask for three measurable controls before production starts. Film thickness targets, cure confirmation, and coverage inspection. A UV tracer helps, but it is not magic. The boards still need clean surfaces and stable humidity in the coating area. Under ISO9001 process control, documenting these settings makes audits far less painful.
- Typical fine-feature caution: keep coating away from tight clearances near 0.1mm traces and dense IC pins
- Masking basics: connectors, buttons, heatsink interfaces, and test points
- QC check: UV inspection plus spot checks for bubbles and thin corners.
Repairability and Rework: How to Remove Acrylic Conformal Coating Without Damage
People like acrylic because it can be repaired without turning the board into scrap. When a telecom customer found a wrong-value resistor after coating, we did not strip the whole assembly. We localized the work area and removed only what was needed. The board passed the functional test on the same day, and the client kept the delivery date.
If you are searching for how to remove acrylic conformal coating or remove PCB coating, the safest method is controlled, local action. In many rework stations, gentle heat from a soldering iron can soften the coating near the joint. After that, the component can be lifted, then the site can be cleaned and recoated. Solvent removal is also common, but it should be validated. Some solvents attack labels, plastics, or certain component bodies.
From an authority standpoint, I align rework steps with IPC-7711/7721 practices and keep records under ISO9001. For trust, we set a clear internal rule: rework requests get a response within 24 hours, including the removal plan and risk notes. That prevents “trial-and-error” on expensive assemblies.
- Local heating: fast for small areas and single-component changes
- Mechanical lift: Use non-metal tools to avoid pad scratches
- Cleaning check: verify no residue remains before recoating and retesting
Acrylic vs Silicone vs Urethane: Choosing the Right Coating by Environment
Selection becomes easier when you stop thinking in brands and start thinking in stress types. In one outdoor gateway project, the PCB saw daily temperature swings and housing flex. Acrylic looked good on paper, yet silicone performed better because the board moved slightly near the mounting points. That flexibility reduced hairline cracks in the coating over time.
Silicone coatings fit high-temperature or flexing conditions. They keep their elasticity and stay protective when assemblies expand and contract. Urethane coatings are a different story. They shine when chemical splash or abrasion is the real enemy. I have used urethane on boards mounted near coolant lines where cleaners were used weekly. The trade-off was slower rework and a tougher removal process.
Acrylic sits in a practical middle. It is often cost-effective and easy to apply in production. It also supports clean inspection, especially when UV indicators are used. For formal programs, I still ask for evidence tied to IPC-CC-830, RoHS, and any required UL file. Those documents matter as much as lab claims when products ship globally.
- Acrylic: balanced protection, simpler rework, production-friendly
- Silicone: best for flex and heat cycling environments
- Urethane: strong chemical and abrasion resistance, harder to rework
Decision Checklist: Turning Requirements Into a Coating Spec
The fastest way to choose acrylic PCB coating is to write a short, testable spec. When a medical accessory team brought us boards that failed after storage, the root cause was not “bad coating.” It was surface cleanliness and uncontrolled cure time. We updated the spec, added incoming cleanliness checks, and locked the cure profile. The result was stable performance across three production lots.
I like to keep coating decisions tied to measurable items. Environment, mechanical stress, and serviceability. If you expect field repairs, acrylic often wins because it can be removed locally and recoated. If chemicals are present, urethane may be safer. If the board bends, silicone becomes a strong candidate. A partner like WellCircuits can help review these trade-offs during DFM, without rewriting the whole product design.
For authority, the checklist should reference IPC-CC-830 for coating expectations and IPC-A-600 for PCB quality baselines. Manufacturing control should sit under ISO9001. For trust, we recommend documenting who approves deviations and committing to a 24-hour response for coating-related NCRs.
- Target areas: define keep-out zones and masking drawings
- Film build: set a thickness window and inspection method
- Process controls: temperature, humidity, cure time, and handling limits
- Verification: adhesion, visual coverage, and functional test after coating
Conclusion
Field failures rarely come from the lab. That coastal sensor job proved it. Salt mist and nightly condensation found every weak spot. A well-chosen acrylic PCB coating turned those returns into stable readings, without a board redesign.
Three takeaways stayed consistent across projects. Acrylic layers protect copper and joints from moisture, dust, and ionic dirt. They apply cleanly by spray and self-level well, which supports fast throughput and repeatable thickness. Clear films help inspection and LED optics, and UV tracer options make coverage checks simple. In production, we still follow IPC-A-600 acceptance logic, verify process control under ISO9001, and confirm compliance needs like RoHS and relevant UL recognition.
Next steps are practical. Map your real environment risks, then choose an acrylic material rated for your temperature and chemical exposure. Set targets such as 0.1mm keep-out near connectors and ±0.05mm mask-to-pad alignment control. Run a small pilot lot, inspect under UV, and track yield goals like 99.5%. If you want a fast review, WellCircuits can respond within 24 hours with coating and process feedback.