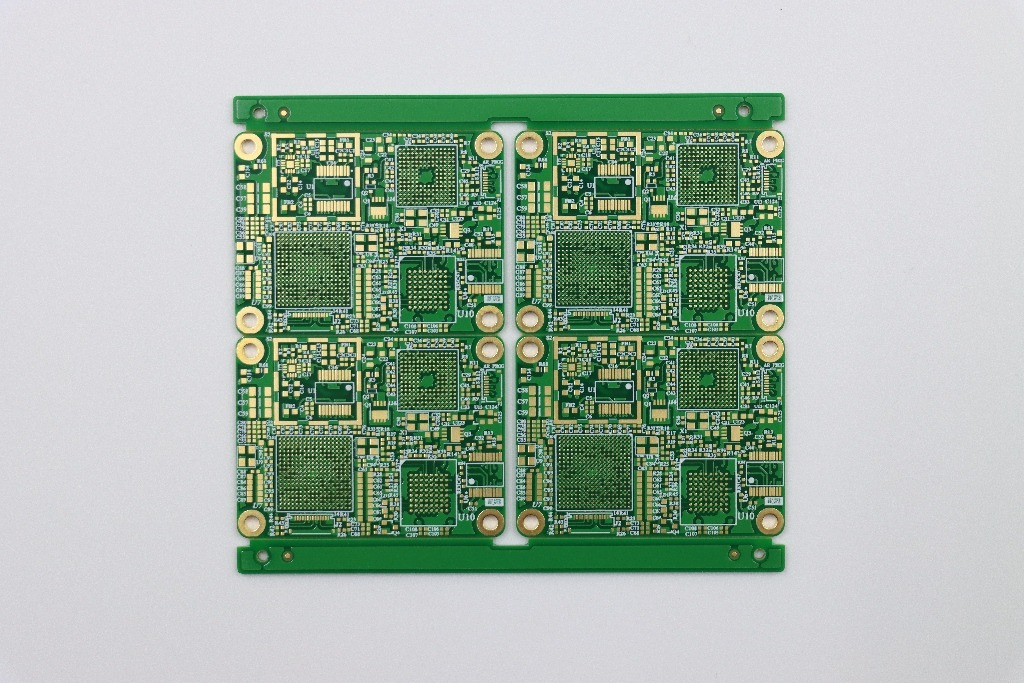
The first time you order a custom PCB, it feels like a simple handoff: export Gerbers, upload files, pay, and wait for a board to arrive. In reality, that “board” is the start of a manufacturing chain where small decisions—an outline imported the wrong way, a missing fiducial, a floating boot pin, an overlooked flash joint—can turn a promising prototype into a week of delays and expensive rework.
I have watched this pattern repeat across startups and established product teams. The technical work is rarely the only risk. Procurement worries about lead time and substitutions. Engineering worries about RF, power integrity, and bring-up. Everyone worries about the moment a prototype batch becomes a pilot run, because that’s where “it worked on my desk” meets the discipline of repeatable production.
This guide reorganizes practical lessons into a buyer-centric path: how to prepare a manufacturable custom pcb design, how to avoid common debug traps, and how to think about cost and assembly strategy when you move beyond a single prototype. Along the way, you’ll see how a custom pcb maker can help or hurt—depending on how well your design package and expectations match the realities of fabrication and PCBA.
1) The Buyer’s Quadrant: What Matters When You Order Custom PCB Boards
Different buyers enter the custom PCB process with different priorities. But the same underlying concerns surface every time: schedule, quality, and risk containment. If you are trying to ship a product, a “cheap board” that arrives late—or arrives on time but fails bring-up—often costs far more than a slightly higher quote from a supplier that prevents mistakes early.
- Hardware startups: need fast iterations, predictable prototypes, and DFM feedback that prevents respins.
- Consumer electronics brands: care about cosmetic quality, consistent assembly yield, and cost-down opportunities without reliability loss.
- Industrial and IoT solution providers: prioritize long-term component availability, traceability, and stable supply chain execution.
Market trend that impacts everyone: small-batch, high-mix production is now normal. That pushes more projects into “prototype-like” complexity even when you are building hundreds or thousands of units. It also increases the value of a supplier who can do quick-turn plus controlled assembly processes and provide a clear engineering response loop.
What differentiates a strong custom PCB manufacturer (in practice)
- Front-end engineering: checks your files, stackup, drill tables, solder mask clearances, and catches contradictions before the job hits the line.
- Assembly discipline: consistent stencil control, paste management, reflow profiling, AOI tuning, and rework standards.
- Supply chain execution: transparent alternates policy, clear handling of shortages, and traceability on critical components.
2) Before You Upload Anything: The Manufacturing Package That Prevents Delays
If there is one “unsexy” truth about custom PCB projects, it is this: delays often start with missing or conflicting files. Many assemblers will pause the job rather than guess, because guessing creates liability and scrap. The fastest route is to submit a complete manufacturing package in one compressed folder and ensure the files describe the same revision of the board.
Manufacturing deliverables you should include for custom pcb design + assembly
- Gerber files for all layers: copper, solder mask, silkscreen, paste layers, mechanical layers as required.
- NC drill files (plated and non-plated if separated) and drill map.
- BOM (Bill of Materials) in spreadsheet form: reference designators, quantities, manufacturer part numbers, acceptable alternates, package, and assembly type.
- Pick-and-place / centroid (CPL) file: refdes, X/Y, rotation, side.
- Assembly notes: polarity conventions, special parts (connectors, shield cans), torque notes, glue dots if needed, conformal coating notes if applicable.
- Test requirements: what “pass” means—power-on checks, UART programming, RF checks, functional tests, etc.
The hidden benefit of a strong package is not only speed. It also reduces the chance that your supplier builds “a board,” but not the board you meant. For procurement, that means fewer change orders. For engineering, that means fewer mystery failures that start with “we assembled what we received.”
3) Design-for-Assembly Rules That Save Your Schedule (and Your Reputation)
A custom PCB may be electrically correct yet still painful to assemble. Assembly pain becomes schedule pain quickly—especially in small batches where engineering time is your most expensive resource. The best custom pcb design is not just functional; it is built for stable, repeatable manufacturing.
Core DfA constraints to plan for
- Fiducials: add global and local fiducials so automated placement and AOI alignment are robust.
- Minimum board size and panelization: aim for at least 2 in × 2 in (≈50 mm × 50 mm). Smaller boards usually need panelization with rails.
- Edge clearance: keep parts at least 0.120 in (≈3 mm) from the edge. If you must go closer, use rails/borders.
- Depanelization choice: tab-routing with mouse bites is often safer than V-scoring when parts are near the edge, reducing damage during separation.
These details matter because they determine whether the assembly line runs smoothly or needs manual handling. Manual handling increases variation. Variation increases defects. Defects increase rework. And rework, in a B2B product timeline, is where confidence erodes with every stakeholder.
4) From Bare Board to Turnkey: Ordering Custom PCB Boards With Components Pre-Attached
When people say “custom PCB,” they sometimes mean only fabrication. But many teams actually need finished hardware. Turnkey PCB assembly (PCBA) is often the difference between “we have boards” and “we can ship prototypes to customers.”
In a turnkey workflow, your supplier fabricates the boards, sources components (or accepts kitted/consigned parts), places components, solders, inspects, and may even perform functional tests and packaging. Many teams prefer this because it concentrates accountability and reduces the coordination burden across multiple vendors. Companies such as WellCircuits typically support both bare-board manufacturing and assembled builds, depending on your project stage and requirements.
What you typically submit for turnkey assembly
- Gerber files for fabrication
- BOM with part numbers, quantities, and alternates policy
- Pick-and-place/CPL file with positions and rotations
Most builds use SMT reflow for surface-mount, plus wave/selective soldering or controlled manual steps for through-hole parts. If your board uses fine-pitch BGAs, unusual connectors, or sensitive RF modules, you should expect longer quoting cycles and more engineering questions. That is not “slow service”—it is a supplier reducing your risk before production.
5) Custom PCB Cost: The Integration Strategy That Often Beats Mounting a Nano
Cost conversations around custom PCB projects often focus on unit price. But a better frame is total delivered cost: PCB area, assembly time, procurement risk, and the number of build iterations before you stabilize.
One of the most common cost traps is reserving a large section of the board for a plug-in module like a Nano/Pro Mini. The board area remains the same, so fabrication cost does not drop. You pay for that empty rectangle whether it is empty or not.
Why integrating the MCU can reduce total custom pcb cost
- Better board-area economics: you use the space you already pay for.
- Lower module dependency: fewer connectors and headers, fewer mechanical failure points.
- Cleaner assembly path: consistent placement and soldering instead of mixed manual steps.
A practical compromise for user-friendly firmware uploads is adding a USB-to-serial interface (for example, FT232RL or equivalent) so the workflow stays familiar without needing a separate Arduino module. The trade-off is that your custom pcb design carries more responsibility: clocking, reset, decoupling, and ESD protection become your job. Still, for many products—especially panel-mounted controllers—integrating the MCU yields a more professional build and often a lower BOM than purchasing complete modules.
6) ESP32 Custom PCB: The Step That Dev Boards Hide From You
Moving from an ESP32 dev board to an esp32 custom pcb is a classic milestone. It is also where teams discover what the dev kit quietly did for them: power stability, RF layout discipline, and small details that prevent intermittent resets.
Tooling and workflow for first-time designers
Choose an EDA tool you can use confidently under time pressure. Cloud tools can be approachable; KiCad and Altium-style tools offer more control as complexity grows. Regardless of tool, you benefit from a manufacturer that provides clear quoting, DFM feedback, and predictable lead times.
The two big concerns: power integrity and RF integration
- Power: select the regulator for input range, current spikes during Wi-Fi transmit, thermal behavior, and required capacitors. Layout matters as much as the datasheet.
- RF: the safest route is an ESP32 module with a certified antenna. Designing your own antenna can work, but it demands controlled impedance, keep-outs, and careful placement away from noise sources.
If your plan includes compact Wi-Fi products, the highest-leverage decision is often module selection: pick an option that is consistently available through your assembly channel and supported in the assembler’s library, so your schedule does not become hostage to procurement surprises.
7) Choosing an ESP32 Module for a Custom PCB LED Controller (WLED)
WLED LED controllers are a perfect example of why “prototype convenience” becomes “production clutter.” Dev boards are great early on, but once you add MOSFET switching, buck conversion, and connectors, the physical build grows bulky and fragile. A custom PCB can integrate the ESP32, power, and LED-driving circuitry into one compact unit.
In this scenario, module choice is not only technical—it is manufacturability. If you want turnkey assembly, prioritize a module that is easy to source and already supported by your assembler’s parts library. You also reduce RF risk by selecting a module with a built-in antenna, avoiding external RF design complexity.
8) Custom-Shaped Boards: Fast Outline Workflow (Inkscape + Fritzing, SVG to Gerbers)
Sometimes your product is defined by its enclosure, and your PCB outline has to follow curves, cutouts, and mounting patterns. If you need a custom shape quickly without diving deep into advanced mechanical CAD, one pragmatic workflow is Inkscape for vector geometry and Fritzing for placing components and exporting Gerbers.
Practical outline steps that reduce manufacturing surprises
- Use Inkscape only for geometry: draw the board outline (and optionally silkscreen contour).
- Keep the path simplification threshold very low (around 0.0001) before “Simplify,” to avoid distorting edges.
- Create two layers: one for board outline and one for silkscreen outline.
- Silkscreen: no fill, white stroke, around 0.008 inch stroke width.
- Board shape: filled shape, no stroke.
- Use exact naming conventions (layer IDs such as “board” and “silkscreen,” path name “boardoutline”) and save as Plain SVG.
Then import into Fritzing, route, run DRC, and export Extended Gerber (RS-274X). This is a beginner-friendly bridge from an artistic outline to manufacturable custom PCB boards, especially for one-off devices or early prototypes.
9) Reliable Outline Import into KiCad: Prefer DXF to Edge.Cuts
If you are using KiCad, the most reliable method is to import a true perimeter outline as DXF and place it directly on Edge.Cuts. SVG imports can be interpreted as filled artwork and may produce invalid edges: fractured polygons, accidental connecting lines, or self-intersections that break DRC and cause CAM confusion.
DXF-to-Edge.Cuts workflow (why it works better)
- Draw the outline using line/pen tools in Inkscape, then convert to a single continuous path.
- Export as DXF and import into KiCad on Edge.Cuts.
- DXF preserves arcs as arcs more reliably; SVG often segments curves into many small lines, which can trigger outline validity errors.
The difference seems small until you are on a deadline. A clean outline prevents time wasted on CAM rejections and ensures your board shape matches the enclosure you already paid to prototype.
10) Bring-Up Stories: The Debug Failures That Look Like Firmware (But Aren’t)
When a custom PCB fails in bring-up, teams often assume tooling or firmware configuration is at fault. In practice, a surprising number of “software” failures are hardware definition problems: floating boot pins, marginal QSPI joints, and signal integrity mistakes that only show up off the eval board.
10.1 Fixing STM32 DFU boot failures: do not leave BOOT1 floating
A classic example: an STM32F401-based custom board appears “dead” and refuses to enter DFU despite correct power rails, decoupling, and USB D+/D− routing. One overlooked cause is leaving BOOT1 floating. On a relevant package, PB2 serves as BOOT1; if it is not tied to a deterministic logic level, boot mode selection can become unpredictable.
The giveaway symptom is DFU starting only under odd conditions—after flux cleaner spray, or when a finger touches nearby pins. That behavior points to unintended conductivity or capacitive coupling temporarily forcing the floating pin into a valid state.
Fix: tie PB2 (BOOT1) to a defined level—commonly a pull-down to GND consistent with the desired boot configuration. Treat boot configuration pins as critical strapping signals in every custom pcb design, even if your dev board seemed tolerant.
10.2 First-time flashing failures: QSPI flash connectivity is often the real culprit
Another scenario: a custom board derived from an evaluation module powers up, rails look correct, but flashing fails repeatedly. UART TX stays low, pulses appear periodically, and the flashing tool reports unexpected data or disconnects. It is tempting to chase configuration settings for hours.
In a real case, the decisive issue was not software at all. It was a hardware assembly defect: one open connection on the external QSPI flash. After reflowing the flash device, flashing proceeded normally.
Bring-up discipline: before deep software debugging, verify external flash solder joints, continuity to the MCU, and basic QSPI signal integrity (CLK/CS/DQ lines). If the device has “nothing in flash yet,” even a marginal QSPI connection can block boot and destabilize UART communication.
10.3 Troubleshooting RF ranging errors on DW3120: separate clock, calibration, and RF path
When a DW3120-based custom PCB shows heavy ranging errors or dramatically reduced link budget compared to an evaluation kit, the fastest method is to separate three causes: clock integrity, firmware calibration, and RF path losses.
- Clock integrity (XTI input): some TCXOs introduce phase-noise artifacts that become problematic after PLL multiplication. Mitigations include switching to a crystal (if temperature requirements allow) and improving supply/termination to eliminate ringing at the XTI pin. A practical tweak that has helped is replacing a ferrite bead with a resistor to reduce TCXO supply noise and make the waveform behave more like a crystal-driven source.
- Firmware calibration (antenna delay): moving from EVB to custom hardware often invalidates antenna delay parameters. Wrong values can produce negative time-of-flight and cause software to discard measurements.
- RF path checks: inspect antenna/feed losses, SMA launch geometry, matching networks, and stackup assumptions for controlled impedance.
A useful diagnostic clue is mixed pairing behavior: if custom-to-custom fails at short distance but a custom board pairs well with an EVB, your protocol stack is likely fine and the limitation sits on the custom hardware.
11) Tables You Can Use to Align Engineering and Procurement
Below are practical tables that reflect how many teams actually decide: what capability level is needed, what lead time to plan for, and what quality controls reduce risk. Treat these as starting points for supplier conversations, not as universal constants—your stackup, component mix, and test requirements can shift the numbers.
Table 1: Custom PCB Fabrication Capability Snapshot (Typical Ranges)
Use this table to translate “we need a custom PCB” into measurable requirements you can put on a quote request.
| Capability Item | Prototype-Friendly (Common) | Production-Ready (Common) | High-Density / Advanced (Selective) |
|---|---|---|---|
| Layer count | 2–4 layers | 6–8 layers | 10–16+ layers (stackup review required) |
| Min trace / spacing | 6/6 mil (0.152/0.152 mm) | 5/5 mil (0.127/0.127 mm) | 3/3 mil (0.075/0.075 mm) or below |
| Min finished drill | 0.30 mm | 0.20–0.25 mm | 0.10–0.15 mm (microvias/HDI) |
| Board thickness | 1.6 mm (standard) | 0.8–2.0 mm (varies) | Custom builds incl. thin cores / impedance control |
| Surface finish | HASL (lead-free), ENIG | ENIG, OSP (cost-sensitive) | ENEPIG, hard gold (edge fingers) |
| Controlled impedance | Basic (best-effort) | Specified impedance with stackup | Tight tolerance; coupon testing |
| Special types | Standard rigid FR-4 | Rigid with castellations, thicker copper options | Rigid-flex / flexible custom pcb (project-dependent) |
Table 2: Lead Time and Cost Drivers for Custom PCB + Turnkey Assembly
Exact pricing depends on your region and complexity, but these ranges help set expectations and highlight what actually drives cost.
| Order Type | Typical Lead Time | What Drives Cost Most | Best Use Case |
|---|---|---|---|
| Bare PCB prototype (2–4 layers) | 3–7 working days (plus shipping) | Board size, layer count, finish (ENIG vs HASL), impedance requirements | Early electrical validation, fit checks, iterative layout |
| Turnkey PCBA prototype (SMT-focused) | 7–20 working days | Component availability, stencil, BGA/QFN density, inspection requirements | Investor/customer demos, beta hardware, small pilot runs |
| Consigned/kitted assembly | Often faster than turnkey if parts are ready | Your kitting accuracy, line changeover time, through-hole labor | When you already own critical parts or need strict traceability |
| RF-sensitive custom boards (ESP32/DW3120 class) | Add 2–5 days for engineering review (typical) | Impedance stackup, RF layout review, antenna/matching strategy | Wireless products where “it works” must become “it works reliably” |
Table 3: Quality Control Checkpoints for Custom PCB and PCBA
This table helps you ask the right questions during supplier selection. You are not buying “inspection”; you are buying fewer escaped defects and fewer field failures.
| Stage | Checkpoint | Typical Methods | Why It Matters |
|---|---|---|---|
| IQC (Incoming Quality Control) | Component verification | MPN check, packaging/label check, sampling, moisture-sensitive handling | Prevents wrong parts and reduces hidden reliability risks |
| PCB fabrication QA | Layer registration and drill accuracy | AOI, impedance coupons (if required), microsection sampling | Reduces opens/shorts and impedance drift that breaks high-speed/RF |
| IPQC (In-Process QC) | Paste print and placement quality | SPI (if available), first-article checks, placement verification | Prevents tombstoning, insufficient solder, and misplacement early |
| Post-reflow inspection | Solder joint integrity | AOI; X-ray for BGA/QFN where needed | Finds hidden shorts/voids before boards reach test |
| FQC/OQC | Functional checks and shipment release | Power-on tests, programming, basic IO checks, visual inspection | Ensures the unit you receive is usable, not just “assembled” |
12) How to Keep Your Supplier Relationship Healthy During Iterations
Many projects fail not because anyone is incompetent, but because communication collapses during iteration. The simplest way to prevent that is to treat each PCB spin like a controlled release.
- Version everything: PCB revision, BOM revision, firmware revision, and test procedure revision.
- Write a one-page build intent: what changed, what must be verified, what is optional.
- Be explicit about substitutions: which parts can be alternated, and what parameters must be preserved (package, temp range, ESR, antenna type).
- Define success: even for prototypes, specify minimum tests (programming, current draw, RF link, LED outputs).
This is where a good custom pcb maker shows its value: not by “saying yes” to everything, but by catching the small inconsistencies that would otherwise become your next bring-up mystery.
Conclusion: Custom PCB Success Is Built on Small, Repeatable Decisions
Ordering a custom PCB is not a single event; it is a chain of choices that either compound into reliability or compound into delays. Clean outlines that import correctly. A complete manufacturing package. DfA basics like fiducials and edge clearance. Sensible integration choices that reduce board-area waste and simplify assembly. And bring-up discipline that checks boot strapping and QSPI solder joints before blaming firmware.
If you want your next build to feel less like gambling and more like a controlled process, treat your supplier as part of your engineering loop. When you are ready, share your Gerbers, BOM, and pick-and-place file and request a quick DFM review before fabrication starts. If you need turnkey assembly for custom PCB boards, ask for an alternates policy and a test plan up front. Teams that do this consistently ship faster.
If you are preparing your next custom pcb design and want fewer surprises, request a quote and a DFM/assembly readiness check from your chosen partner (many teams working with WellCircuits do this before locking a prototype build). Upload your Gerbers, BOM, and CPL together, and include a short note describing your use case (ESP32 Wi-Fi device, LED controller, STM32 DFU programming, DW3120 ranging, etc.) so the review focuses on the risks that matter most.